Moodle
Installation
Obtain SmarterProctoring LTI Keys
- Contact SmarterProctoring to obtain your LTI keys and get your SmarterProctoring account provisioned. You can email Andrew Davis at andrew@smarterservices.com
Configure the External Service
External services can be added to individual courses or to all courses in an institution. The scope of your SmarterProctoring implementation will dictate how you create these links. The process for adding the links to course is virtually the same regardless of method. It's much easier if you setup the external service in the site administration first.
- Navigate to External Services,
Site administration > Plugins > Web services > External services.
- Click the "Add" link under Custom services.

- You will need to complete the form using the following settings:
- Name: SmarterProctoring
- Enabled: Checked.
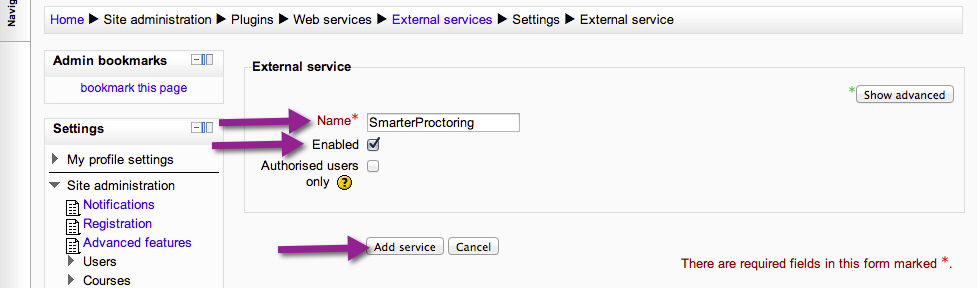
Click the "Add service" button.
- Click the "Add functions" link.

- You need to add the functions listed below. Hold the Ctrl key on Windows or the Cmd key on OSX and click to select multiple values.
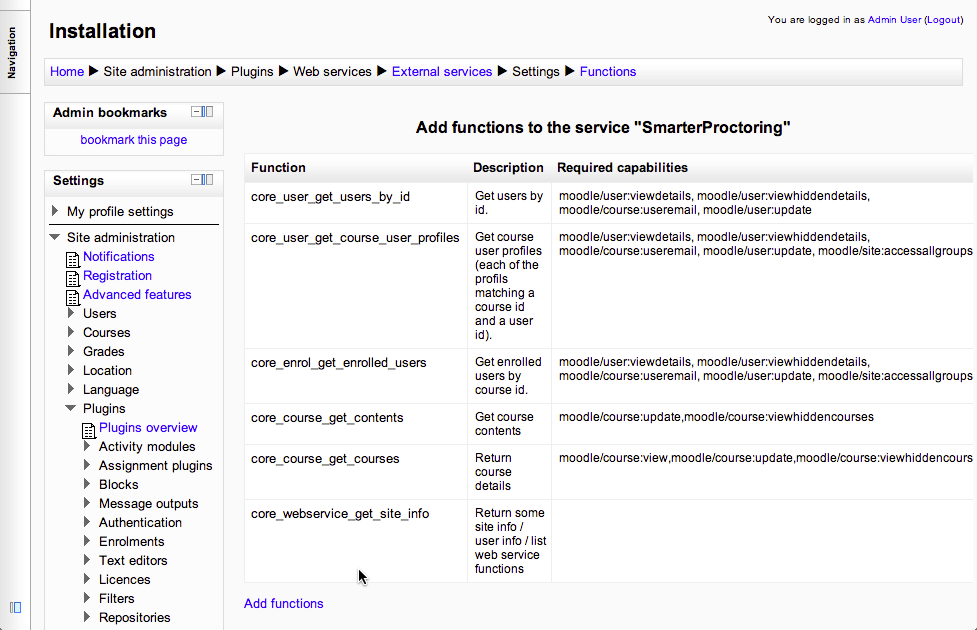
- core_course_get_contents
- core_course_get_courses
- core_enrol_get_enrolled_users
- core_user_get_course_user_profiles
- core_user_get_users_by_id
- core_webservice_get_site_info

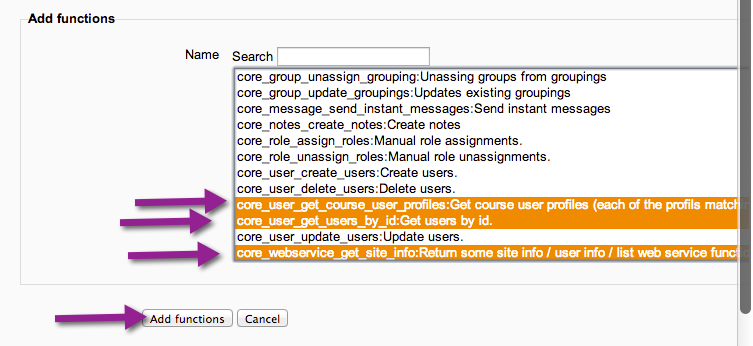
- Click "Add functions" button.
- Confirm that all functions listed are available. If you're missing a function, then click "Add functions" link and repeat the previous steps.
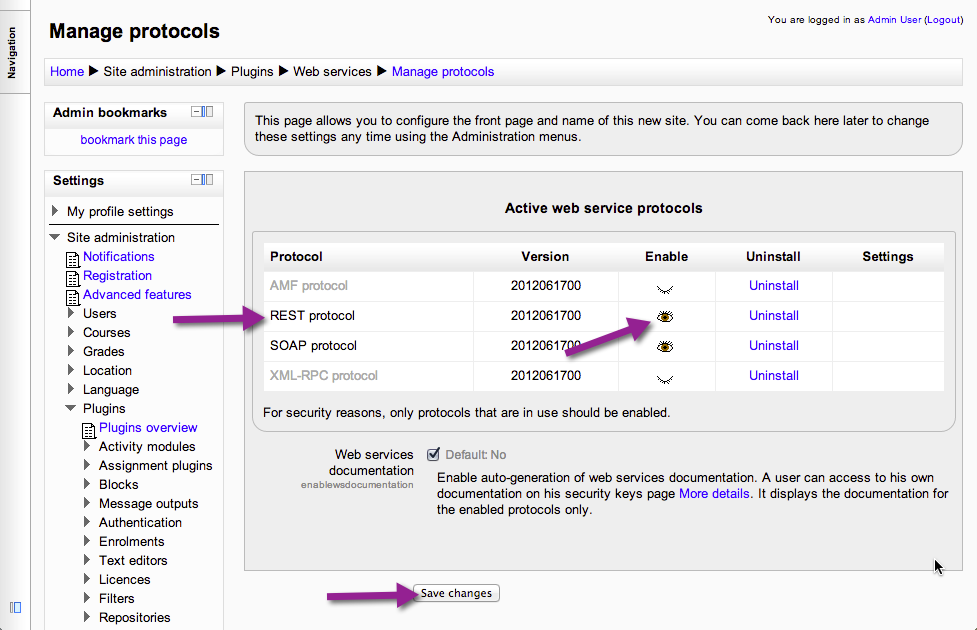
- Navigate to Manage Protocols,
Site administration > Plugins > Web services > Manage protocols.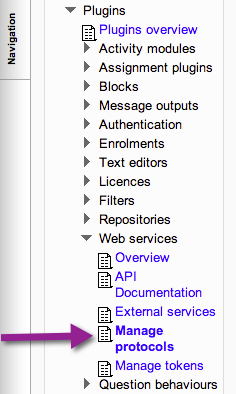
- Verify REST protocol is enabled. If the eye is closed, then click it to open the eye. And then, click Save changes. If the eye is already open, then skip this step.
- Navigate to Manage Tokens,
Site administration > Plugins > Web services > Manage tokens.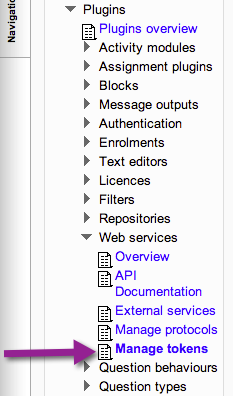
- Click the "Add" link.

- You will need to complete the form using the following settings:
- User: Select a user with access to the web service functions requested earlier. This is typically an admin user or you can create a special user for SmarterServices.
- Service: SmarterProctoring
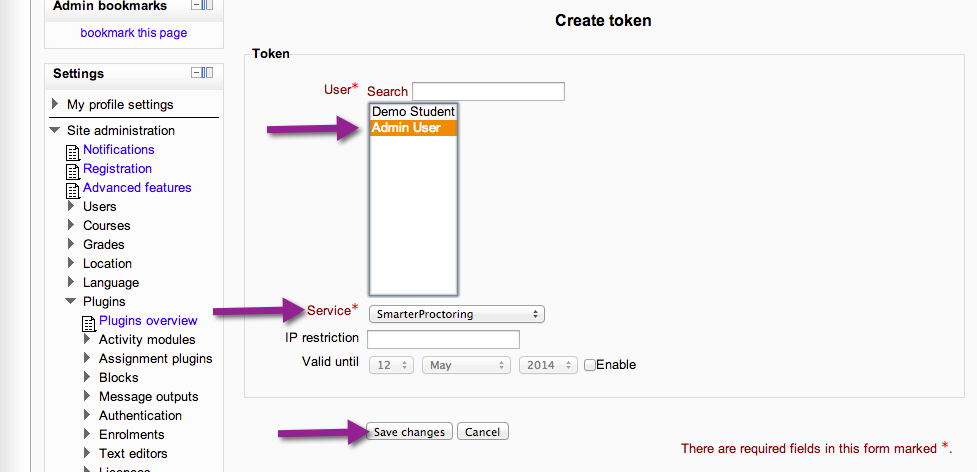
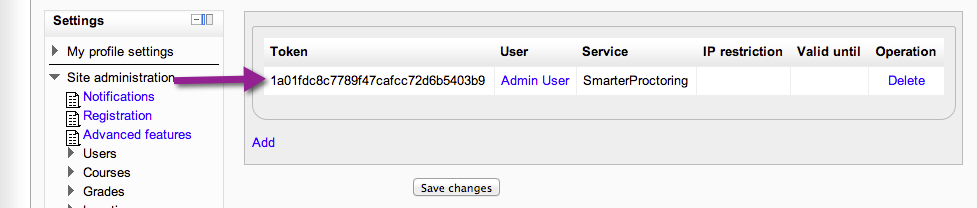
- Click "Save changes" button.
- Copy the Token and email it to Andrew Davis at andrew@smarterservices.com
- Navigate to External Tool,
Site administration > Plugins > Activity modules > External Tool.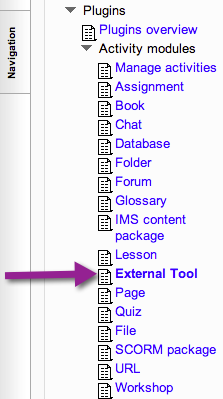
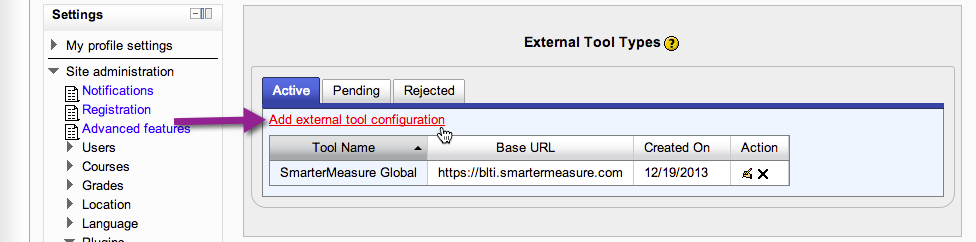
- Click "Add external tool configuration" link.
- You will need to complete the form using the following settings:
- Name: SmarterProctoring
- Tool Base URL: https://www.smarterproctoring.com/lti/course
- Consumer Key: Value provided by SmarterProctoring
- Shared Secret: Value provided by SmarterProctoring
- Show tool type when creating tool instances: Checked
- Default Launch Container: New Window
- Share launcher's name with tool: Always
- Share launcher's email with tool: Always
- Force SSL: Checked
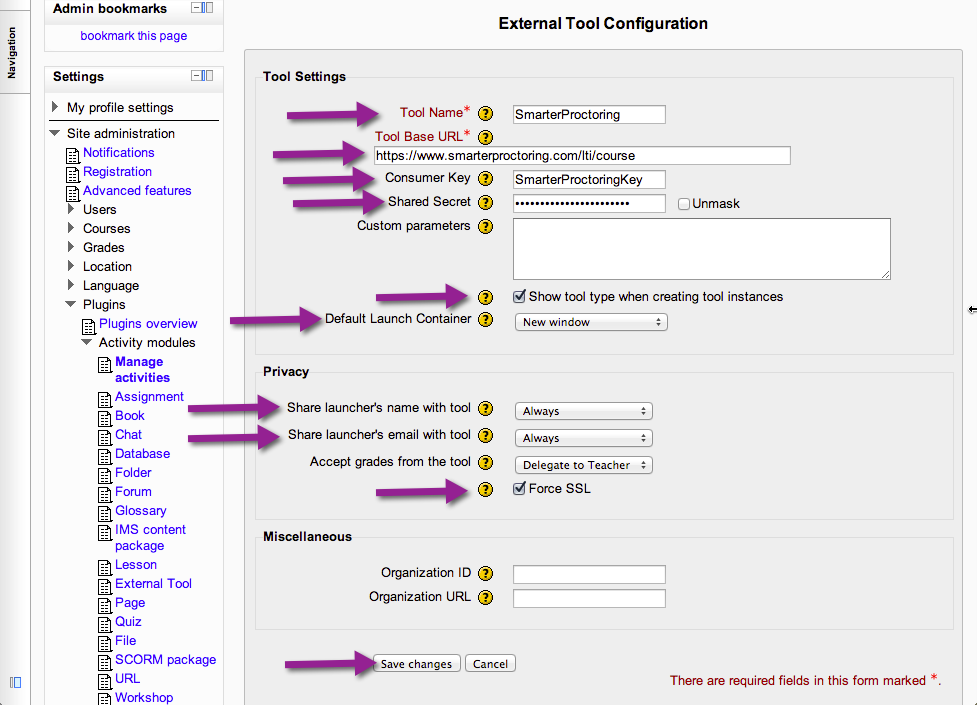
- Click "Save changes" button.
Adding SmarterProctoring to a Course
Once the External Tool has been created, then it can be added to a course's content. This section will walk-through placing a SmarterProctoring link in a course.
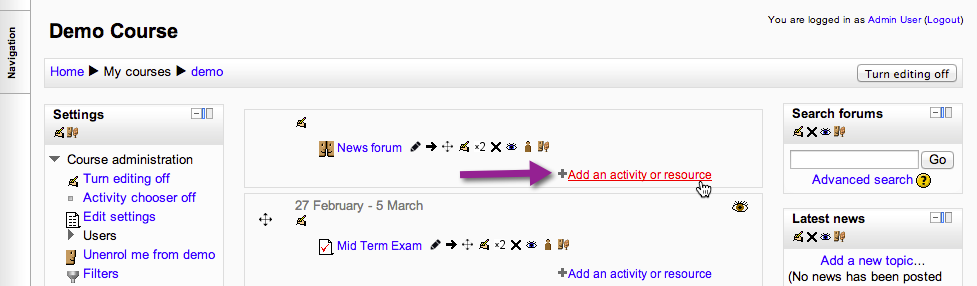
- Navigate to the course dashboard.
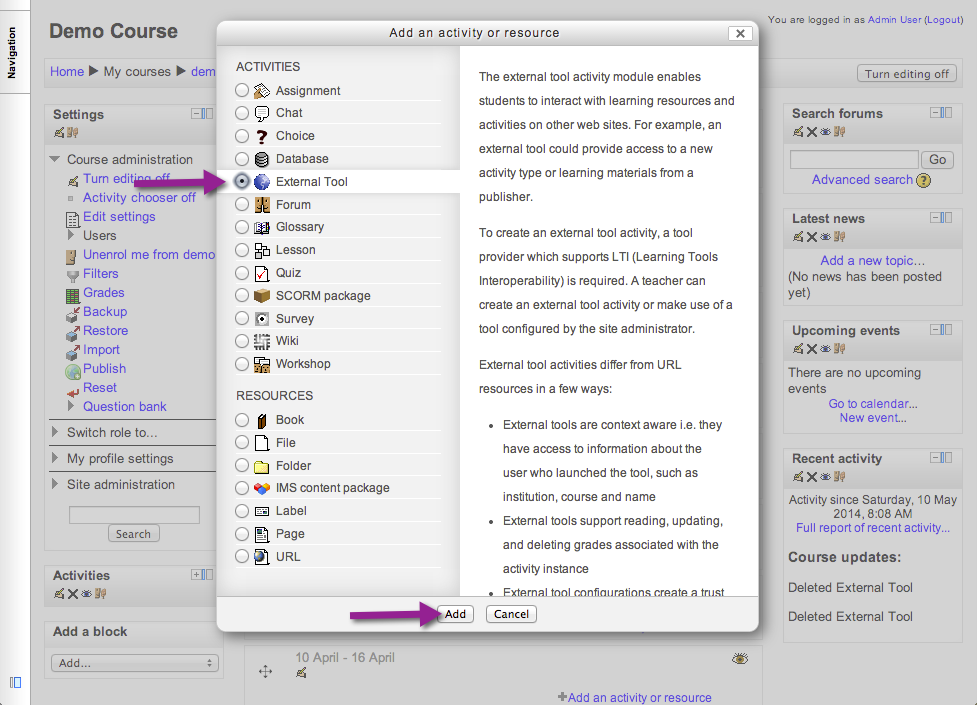
- Click an "Add an activity or resource" link.
- Select External Tool, and then click the "Add" button.
- You will need to complete the form using the following settings:
- Activity Name: SmarterProctoring
- External tool type: SmarterProctoring
- Launch Container: New window
You may also change the Activity Description and check any of the Display checkboxes.
If your browser auto-filled Consumer Key and/or Shared Secret, then remove those entries.
- Click the "Save and display" button.
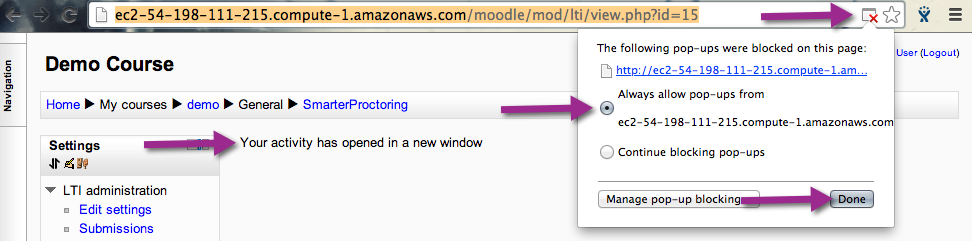
- SmarterProctoring will open in a new window.
- If your browser blocks the request, then allow popups from your Moodle website.
- Verify the launch screen
- If you receive a simple error about web service access, then SmarterProctoring has not yet installed your web service token. Try again in a few minutes or contact support.

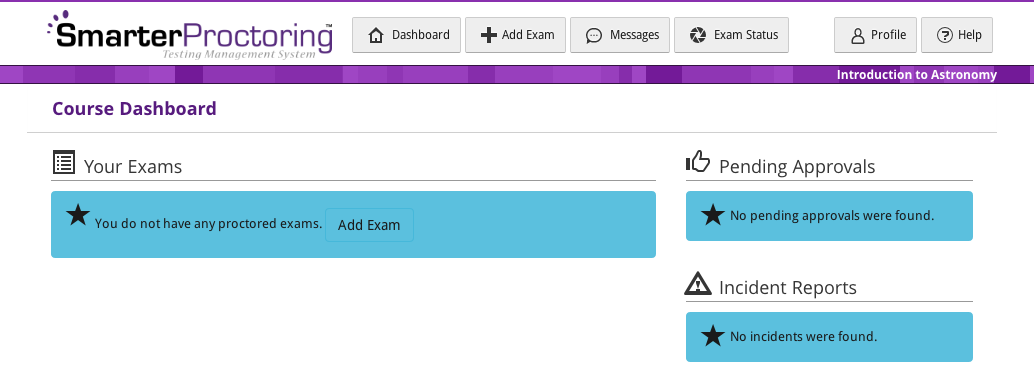
- If you see the course dashboard then, SmarterProctoring is ready to use. You may add exams, approve proctors, etc.
- If you see a request to Add Course or permission request screen, then follow the Add Course to SmarterProctoring section below.

- If you receive a simple error about web service access, then SmarterProctoring has not yet installed your web service token. Try again in a few minutes or contact support.
- If your browser blocks the request, then allow popups from your Moodle website.
Add Course to SmarterProctoring
This section assumes you've completed all previous parts of this guide.
- Click on a SmarterProctoring link from within a course.
- The getting started screen will be displayed. Click the "Add Course" button to continue.
You can also click the "Learn More" button, and then click the "Add Course" button to continue.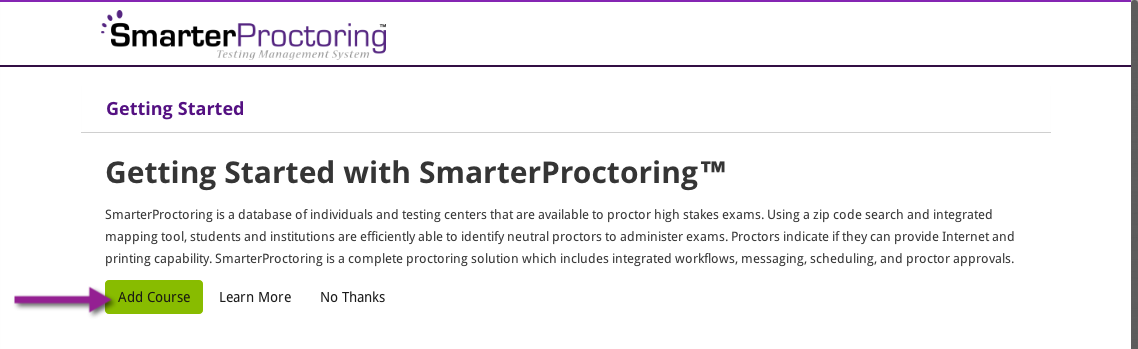
- Your course details will be displayed. Select your Time Zone, and then click the "Setup This Course" button.
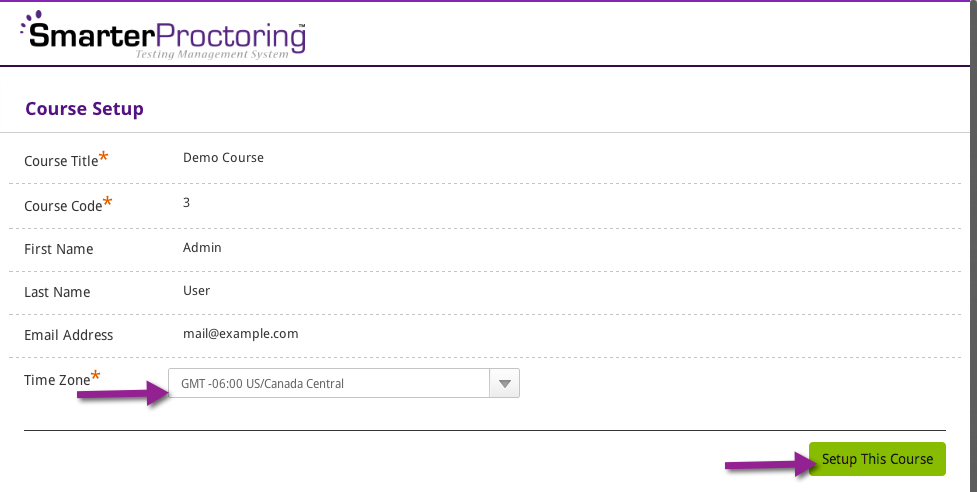
- Your course has now been setup in SmarterProctoring. You'll need to setup exams within SmarterProctoring in order for students to schedule proctoring sessions.